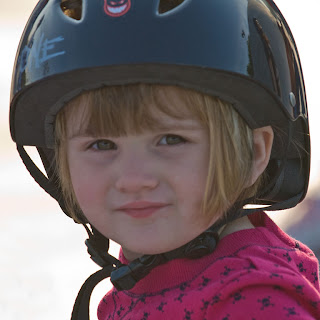
 As promised, here's my base image I'm going to be spending the next seven consecutive days posting about. As bad as it looks, note that this is after some Adobe Camera Raw tweaks, so it was pretty horrible straight out of camera -- white skating surface with backlighting behind a face hidden in a helmet -- no flash, no HDR. There's a fair amount of fill applied here in ACR just to get it to this point. It was chosen to test Topaz Adjust, a relatively new Photoshop add-on that can be used to heighten contrast and bring out shadow detail ... and as you'll see later in the week, it did a pretty good job with this image. But you'll also be seeing how blending modes can be used to key shift an image into a completely different color range. You'll also see my workflow -- masks, textures, and all. Feel free to comment as we go -- not necessarily about the image but about my workflow and thoughts about what direction you'd want to take the image on each post. No fancy gallery frames on these photos -- this is going to be down in the trenches Photoshop work. Oh, and by the way, go ahead and click the image to see a larger version. As if this image didn't have enough problems, it's probably one of the least sharp I've ever taken.
Into the trenches we go.
Looks like focus was somewhere around her ear. It will be interesting to see what you do with this one.
ReplyDeleteDHaass
Or even further back, maybe the back of the helmet. Camera data was 200mm, 1/250 sec at f/6.3, +0.3 EV, ISO 200, no flash.
ReplyDeleteI can't wait to see what you do with this one --- I often have images captured like this! I have deleted them in the past but maybe won't have to in the future.
ReplyDelete